Mostly cake is now on Blog Lovin
Category Archives: other stuff
Apple Cider Cake
I love apples but when used in a cake I’m not so keen on the lump texture they give. This cake gives you a taste of the apple but in layers rather than scattered throughout the cake. I added the cider for extra flavour and because I’d read a recipe where cider was reduced to make a glaze, so I’ve used that here too.
Ingredients;
175gm unsalted butter or margarine ( I use Stork)
175gm caster sugar
3 eggs, lightly beaten
175gm self-raising flour
For the apple filling/topping:
3 apples, I used Braeburn
3 tbs cider
3 tbs double cream
1tsp cinnamon
1 tsp vanilla essence
Glaze:
300ml cider
3tbs icing sugar
Method:
- peel and core the apples and cut into quarters, then slice them thinly
- put apples in a bowl and add cream, cider, cinnamon and vanilla essence and mix together
- In another bowl cream the butter and sugar until soft and smooth
- add the eggs a little at a time and beat together, if the mixture begins to curdle you can add 1 tbs flour.
- fold in the flour
- strain the apples and put any liquid into the cake batter.
- put half the cake batter into a greased and lined 8″ round tin. preferable a loose bottomed tin, or I use a silicone one.
- spread half the apple mixture over the cake batter
- top with remaining cake batter
- finally arrange the remaining apple mixture over the top of the cake
- bake for 30 – 35 minutes on gas mark 5 or 190°C
- when cake is cooked and an inserted skewer comes out clean leave to cool
- while cooling cake heat up cider in a pan to boiling, leave until you are left with a reduction of around 2 tbs of cider
- leave cider to cool
- turn out cake on to a wire rack to cool completely
- when cider and cake is cool make glaze
- add sieved icing sugar to the cider reduction and spread over the cake.


Cake Photo Book and Competition
I was given the opportunity to make a photo book from Vista Print site
I’ve made a photo book before using my favourite photo’s of my children and I really love it, so I was thrilled to be able to make a book of my cake photos.
The process is simple, you choose your book size, add your photos, add any extras like backgrounds and text then in a few clicks it’s all sent off to be printed. A few days later your book is in your hand.
One thing I will say is that building your book can be very time consuming so it’s best to be prepared. I’ve found that the first job is to sort out which photo’s you want to use and put them all in a folder for easy access. This saves searching around for photos while you are in the process of building your book.
On VistaPrint you can edit your photos while building your book. This means you don’t have to spend ages editing them before hand, and you will know exactly how they will look in the book.
When you open up the application you will find places set out for your photos and any text you may wish to use. These are all completely editable, you can move them around, delete them or add extras, and it’s all very simple to do.
It is a time consuming process though, you choose your photos, choose where you want them to be, add text or backgrounds or even frames. You may not finish in one sitting so it’s handy that you can save your work at any time and return to it later. It took me about three hours to finish my book.
You will get warnings if your photos are not the best quality. You can choose to edit your photos or swap them for better. I left a few with warnings in and they were still printed.
For my book I chose to do a mixture of my favourite cake recipes followed by a montage of photos of the cakes I have decorated. My photos were not all brilliant, I’m no photographer, but the book still gave me great pleasure.
I chose the extra large 30cm by 30cm square book with a hardcover. I was also able to add photos to the cover both front and back.
I love the quality of the book, the pages are glossy and bound together well. The overall effect is very professional looking.
If you would like to make a photo book please continue to the end of this post where I will give you details of how you can enter my give away.

My Cake Book


VistaPrint have given me a voucher for a photo book of your choice. You can choose the size and finish and fill it with whatever photos you wish. To be in with a chance of winning this fantastic prize please just comment below and let me know what you would use your photo book for, for example, your holiday pics, your baby pics, family day out etc.
This competition is for UK entrants only.
This competition may also be promoted on our Facebook page.
This competition will end on 9th May when one winner will be chosen at random.
Good Luck!
The competition is now closed and the winner chosen by random org. was no2 Sprigtreasurer, Congratulations, I’ll contact you with details very soon.
Disclaimer: I was given a voucher from Vista Print to make a book of my cakes. I was also given a voucher to give away to one of my readers by competition.
Merry Christmas
I’d like to wish everyone a very Merry Christmas and a Happy New Year.
Here is my finished Christmas Cake:

You can see how I made it here: Christmas cake
My Christmas Wish List
First up I’d like a new house with a lovely new kitchen!! It might sound a bit extravagant but I’m actually going to look at a house on 18th December, I’m not sure what it’s like yet, but if the kitchen is good then I’ll be a happy bunny.
Next up here is a list of Smart Ideas for Christmas From Morphy Richards.
I could really do with a new mixer and this one fits the bill for me, the gorgeous yellow one would look great in my current colour scheme (cream and yellow) It has four different speeds and boost.

Yellow Hand Mixer from Morphy Richards
Apart from making cakes I also love making my own bread. I’ve never owned a bread maker but when I get my new kitchen it’s one gadget I’d definitely love. This is the one I’d choose from Morphy Richards. It boasts 17 programs, 3 different loaf sizes and even a fruit and nut dispenser!

Premium Manual Breadmaker from Morphy Richards
Finally, all my friends are raving about their slow cookers so I’m eager to see what the fuss is about and I’d love this partitioned slow cooker to be on my Christmas gift list. It has a 6 ltr capacity and a separate cooking post
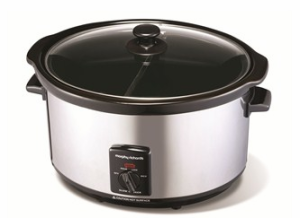
Patitioned Slow Cooker from Morphy Richards
Merry Christmas everyone!!
This post is my entry into Foodies100 competition ‘Win Your Christmas List From Morphy Richards’
Cake International
Today I had the pleasure of visiting The Cake International cake show at Birmingham NEC. I bought lots of lovely cake things, from boxes to fondant and lovely new rolling pin and mat. I also bought some letter cutters and some Christmas moulds, oh and a turntable which should make cake decorating a little easier.
There were lots of stalls showing you how to do decorate cakes and make gorgeous sugarcraft items. Unfortunately, I didn’t really have much time to take a lot in.
I started my visit by looking at all the competition cakes. Wow, they were amazing, there is so much talent in cake decorating. I’ve taken some photos to share with you. I was really impressed with the cakes from the under 12’s category.


Lemon Drizzle Cake
I love this cake, it’s lovely lemon freshness with the sticky tangy icing, and the sweet syrup running through. It really is a treat.
Ingredients:
- 175g (6oz) unsalted butter (or Stork)
- 175g (6oz) caster sugar
- 3 eggs, lightly beaten
- 225g (8oz) self-raising flour
- 2 tbsp milk
- finely grated zest of one lemon
- 6 tbsp lemon juice
- 3 tbsp golden syrup
For decorating:
- Itbsp lemon juice
- 50g (2oz) icing sugar
- little water
Method:
- Preheat oven to 180C/gas 4
- lightly butter and flour a 2lb loaf pan
- cream the butter and sugar together until they are fluffy
- whisk in the eggs a little at a time
- fold in flour
- fold in milk, lemon zest and half the lemon juice
- put in pan and bake for one hour or until a skewer comes out clean
- Just before cake comes out of the oven, heat the remaining lemon juice and golden syrup.
- Prick the warm cake all over with a skewer and drizzle the lemon syrup all over it. Leave it to cool in the pan.
- Make a thin icing with the lemon juice water and icing sugar and drizzle over the cake when it is cool.
Now because this cake is in the oven for a long time it’s easy to burn it (like I did today!) so keep an eye on it and if it looks like it’s getting too brown before it’s cooked you can cover the top with a piece of foil, Mine might have turned out a little too brown but it was still yummy.

Making Coloured Fondant
Next week I’m making a cake for my daughter and needed a rainbow of fondant colours. When adding colours to white fondant I find it is messy, difficult to get the colour right and it often changes the texture of the fondant. I’ve always found buying coloured fondant easier, but when you need a lot of colours for one cake it can work out pretty expensive. So I decided to have a go at making some coloured fondant.
First I checked out some recipes. Then I found a box of Silver Spoon fondant icing sugar on the supermarket shelf. Instructions…add water and kneed. I decided to give it a go.
The instructions called for 2 tablespoons of water to 1lb of icing sugar. I didn’t want to make 1lb of any one colour so I worked it out. For 250g of icing sugar I would need approximately 10ml of water. (As you can see my math isn’t brilliant) I would also be adding the colours before the water.
I took it slowly, first adding a few drops of colouring then the water drop by drop until I had a dough like mixture. Then I kneeded it and covered it in cling film while making the other colours. Soon I had six different colours of fondant. I already had the seventh colour in my cupboard.
I haven’t worked with them yet, but they look and feel good so I’m optimistic, and they cost a fraction of the price of buying coloured fondant.


Hello Kitty Cake
This is the Hello Kitty cake I made for my daughter’s 5th Birthday.
I used my basic cake recipe to make two cakes. I had decided to make a two tier cake with a fondant Hello Kitty on the top.
I covered both cakes and the cake board in pink fondant icing. Then I used blue, green and yellow icing to cut out circles in three different sizes. I placed these randomly over the two cakes. I made the Hello Kitty myself and bought a number five candle. When making a tiered cake you need to place supports in the lower cake so that it doesn’t sink under the weight of the top cake. As these cakes where fairly small, the bottom was 7 inches, the top 6 inches, I used plastic drinking straws for support. For heavier or larger cakes I would use dowling rods.

Hello Kitty Cake for 5th Birthday
Basic Cake Recipe
This is the basic cake recipe I use for most of my cakes. This will make one 7inch round or square cake.
Ingredients:
180g Stork (baking margarine, I find it works nicer than butter)
180g caster sugar
3 medium eggs (if they are too large or too small I will weigh them to make sure I have 180g)
180g self-raising flour.
If making a chocolate cake I omit 2 tbs of flour and add 2tbs of cocoa powder.
For the filling I use butter cream
50g Stork or unsalted butter
150g icing sugar
1tsp vanilla extract
Method:
First I cream the Stork and sugar with a wooden spoon.
Then I add the eggs, one at a time and beat them in with my spoon. I find doing it this way the mixture never curdles, but if it does you can always add a little flour.
Once all eggs are in I add the flour and mix slowly.
I use two 7 in cake tins and share the mixture between both.
I then put them in the centre of the oven at gas mark 6 (200 C) for 25 mins.
I always check they are cooked through with a skewer, it should come out clean.
I leave to cool for at least 10 minutes before turning out of the pans. Then I leave the cakes to cool completely before freezing.
I always freeze cakes,even if only for an hour. This makes them much more easier to trim and shape. Before freezing I cover them with cling film. They defrost pretty quickly once back at room temperature.
To make the filling I soften the butter (Again with my wooden spoon) and then add the sifted icing sugar. once mixed I add the the vanilla extract.
I often use buttercream to put a layer on the cake before icing. I think it tastes nicer than apricot jam.


